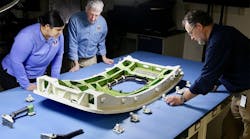
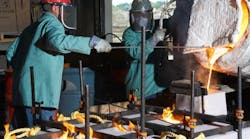
Digital radiography for aluminum castings has been nudged toward wider acceptance by the development of a set of standard reference images. They are contained in the new ASTM standard E 2422, Reference Digital Images for Inspection of Aluminum Castings.
The task of developing these reference images was more complex than digitizing the images used in current standard E 155, Reference Radiographs for Inspection of Aluminum and Magnesium Castings. Instead, according to Michael Horky, principal level III, RT, Boeing Commercial Airplanes, to create the new standard the members of the ASTM task group had to understand the spatial resolution differences between various detectors; contrast the differences; determine which digitization scan resolution was appropriate; and develop a process for normalizing the digital images for the wide variety of digital systems in the industry.
ASTM International standards are accepted and used in R&D, product testing, quality systems, and commercial transactions around the world. The reference-image work was carried out by Subcommittee E07.02 on Reference Radiological Images, which is organized under ASTM International Committee E07 on Nondestructive Testing — one of 138 standards-writing committees.
The set of digital reference images consists of 13 files, software to load the desired format, and specific instructions on loading. The 13 images illustrate eight grades of severity and contain an image of a step wedge and two-line pair gauges.
The digital reference images illustrate types and degrees of discontinuities found in aluminum-alloy castings with section thicknesses of 0.25 in. and 0.34 in.
According to Horky, “This opens the door for inspecting production hardware, which was not allowed in many industries before this standard was developed.”
The standard includes language about implementing the standard by a casting supplier and its customers. “All areas of this standard may be open to agreement between the cognizant engineering organization and the supplier, or specific direction from the cognizant engineering organization. These items should be addressed in the purchase order or the contract.”
The digital reference images listed in Table 1 illustrate each type of discontinuity in eight grades. While eight grades of each discontinuity are provided, a numerically smaller graded set of discontinuities based on these reference images could be used for acceptance standards. The radiographic technique used is in agreement with Guide E 94.
Alloys used to reproduce the various discontinuities are listed in Table 2. Table 3 lists the thicknesses of the step wedges in the reference images, made of 6061 aluminum. Misruns, core shifts, cold shuts, and surface irregularities are not illustrated, but are readily identifiable by surface inspection or other NDT methods.
What might be next for digital radiographic reference standards? Horky reports that a task group has been formed to make digital images for ASTM E 192, Reference Radiographs for Investment Steel Castings of Aerospace Applications. And, he says there is a need for digital images for magnesium and other metals and notes that the E 2422 task group documented the development process, to use in designing digital images for other metals.


