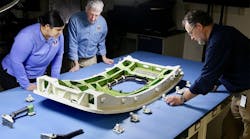
Due to the complex shapes of alloy automotive wheels, manufacturers are presented with a large, difficult product for temperature monitoring. The molds used in such operations include an array of heating and cooling chambers to regulate the mold temperature and create an even temperature gradient across the complex mold surface.
Proper mold temperature has several impacts on the end product. From a safety perspective, stresses and microfractures in the wheel are not an option, while from the production perspective scrapped products are simply too costly to tolerate.
Molten aluminium alloys, with temperatures up to 930°F (500°C) require tight regulation of mold temperature to maintain the quality of the finished product. Another factor in product quality is the uniform application of a mold release agent. These two factors are interrelated.
Although the optimum temperature for a mold prior to metal pouring may have been correctly determined, a mold can become oxidized over time. This causes the emissivity of its surface to increase, which affects the detection of infrared energy emissions and the resulting accuracy of the temperature measurement when using infrared thermometers.
Spraying a mold-release agent on the surface of the mold helps to cancel out the affect of changes in mold emissivity, however it does require close control. Too much release agent can cause the mold to cool and can create a coating which will not dry. Excess coating causes pinholes to appear in the finished wheel. By contrast, too little release agent may cause the wheel will to stick and damage the mold, and shorten its service life.
Temperature-monitoring alternatives
One drawback of spot pyrometers in automotive wheel molding is evident from the name. When pointed at a mold in order to check its temperature prior to metal pouring, a spot pyrometer of course detects the temperature of a very small area. When mold temperature is governed by complex zone heating or cooling techniques, a temperature map of the entire mold temperature is needed if sufficient diagnostic information is to be attained.
Thermocouples, either embedded into the mold or touched onto the surface of the mold, suffer from the same disadvantages as spot pyrometers. They conduct point-temperature measurements and do not yield data on all portions of the mold. In addition, thermocouples historically suffer from poor response time and a tendency to drift.
The advantages of thermal imaging over pyrometer and thermocouple-based solutions are illustrated graphically in Figures 1 to 4. These thermal pictures, recorded by Ircon’s Mold Inspector system, show the process of withdrawing an aluminium automotive wheel from a mold. For the purpose of illustration, the wheel mold here is viewed by a thermal-imaging camera mounted at an angle of 45°. In practice, the camera would be positioned above the mold to attain a perfect thermal mapping of the mold temperature.
Incorporating a focal-plane array detector comprising 76,800 individual pixels arranged in a 320 3 240 pixel grid, the Maxline 2 thermal-imaging camera is, in effect, a non-contact infrared thermometer capable of providing a complete thermal image of a mold in real time and at an adjustable speed up to 60 frames per second.
Thermal data gathered by the camera can be stored for VCR-style playback, used for on-line process control or exported to an external database for quality-control purposes.
The architecture of Ircon’s complete Mold Inspector system is shown in Figure 6. Running on a standard PC equipped with an analog or digital frame-grabber card, the Mold Inspector software allows users to define up to 50 specific “areas of interest” (AOI) for each mold. AOIs, in the form of circles, rectangles, or free-form shapes, can be drawn around targeted mold zones in order to monitor individual hot and cold spots.
Temperature data for each AOI, including minimum, maximum, and average, can be displayed numerically while thermal images of the complete mold based on absolute and differential temperature measurements can be shown simultaneously. By defining a line across the thermal image as an AOI, the software can display temperature as a 2D graphic profile.
Independent alarms can also be configured for each AOI. Alarm signals generated during the heating and cooling processes can be viewed either directly on the PC screen, logged to hard disk, or linked via an optional I/O interface module to provide outputs for process control.
Practical advantages
By defining the surface area affected by a mold’s heating and cooling chambers as areas of interest, it’s possible to use a personal computer to detect any malfunction in the process — visually via the thermal image, numerically from the data acquired or as flagged by an alarm.
As a result, the user can reliably ensure that all critical areas within the mold have attained the correct process temperature prior to receiving the molten metal. The surface characteristics of the finished part are predictable as a result and the service life of the costly mold is assured.
In the application of a mold-release agent, thermal imaging is significant. The thermal-imager system enables the user to study the cooling effect of the release agent on the mold surface, and so enables the user to determine if the mold release agent is being applied evenly.
Due to short manufacturing cycle times, product defects caused by a blocked nozzle on a mold-release spray gun can stay undiscovered for several days. By looking at the changes in temperature characteristics of the mold as the release agent is sprayed in, problems can be identified prior to casting. The life expectancy of the mold is extended, scrapped product is reduced, and less release agent is wasted as a result.
Making repairs or modifications to metallic molds is common with certain processes. Weld repairs are performed at very high temperatures. Often this can cause the area around the weld to have different surface characteristics to the rest of the mold. In addition, the repaired surface can change over the mold’s life, which can lead to product imperfections.
By assigning AOIs to the mold’s repaired areas, the thermal-imaging system can closely monitor any known flaws during the preheat phase, while the mold is cooling down, and after the molded part has been removed. Through better inspection of mold flaws, scrap product is once more reduced and traceability of the mold flaws can be fully documented over time.
Already well established in its temperature monitoring role in off-line maintenance operations, thermal-imaging technology is bringing significant improvements to on-line product molding applications. Quality-critical automotive product manufacturing demands an accuracy and depth of diagnostic data and traceability that is readily provided by infrared camera technology combined with off-the-shelf application-specific PC software packages. Preventative maintenance procedures and new product R&D programs will also gain from the capabilities of thermal imaging.
Jeff Kresch is the director of marketing for Ircon Inc. He formerly was product manager for thermal-imaging and line scanning products, and national sales manager.


