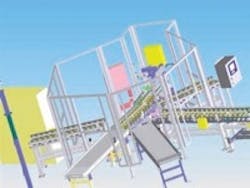
Fixture and system for inspecting passageways in lost-foam aluminum engine blocks.
One of the big advantages of casting complex parts is the ability to use coring to form internal passageways through a complex design when molten metal is poured into a mold. Before machining it, the foundry usually must confirm that there is no blockage in the passageways. An innovative approach to performing this necessary step with lost-foam-cast aluminum engine blocks has been devised by Rogers Associates Machine Tool Corp., a developer of special-purpose systems. RAMTC has applied its Adaptavision technology, which involves machine vision techniques to the task of inspecting casting interiors. The system checks 10 oil passageways for blockage, using "smart" cameras, a lighting system, and machine vision software. It checks not only straight-through passageways, but also several blind-through passageways.
First, the casting is placed in a special fixture. For each straight-through hole, an LED light is positioned at one end of the passageway and a CCD camera at the other. The blind passageways include not only those from the main bearing and the balance shaft cavities, but also passageways from the top of the engine block to cavities that joined other cross-holes. To obtain an image of these passageways, higher-illumination LED spotlights are used.
To capture images of light passing through the blind passageways, RAMTC mounted 10 Cognex In-Sight 5000 cameras in the fixture holding the engine block. Depending on the type of passageway to be inspected, specific features of images captured from the 10 cameras are analyzed to arrive at a pass/fail decision.
Although some cameras were mounted perpendicular to the oil passageways, images of other, more complex blind passageways were imaged using cameras placed at an angle to the holes. As a result, it is necessary to perform a number of machine-vision functions on each of the images to determine whether or not the passageways are blocked.
These functions include measuring the intensity of light as it emerges, the area and perimeter of the light, its height-to-width ratio, and its on-axis angle. For example, the In-Sight software calculates the perimeter of the light. Should any blockage occur in the passageway, the perimeter of the light image would be reduced. After image measurements are made, the system weights the measurements and makes a pass/fail decision for each of the 10 cameras. This information is transferred to the system's PLC, which marks the cast block with a code before it is indexed out of the system.
To read the original presentation, "Vision System Inspects Passageways in Castings," look for the November 2006 issue, pg.16
| Digital Radiography For Aluminum Castings The task of developing these reference images was more complex than digitizing the images used in current standard E 155, Reference Radiographs for Inspection of Aluminum and Magnesium Castings. Members of the ASTM task group had to understand the spatial resolution differences between various detectors; contrast the differences; determine which digitization scan resolution was appropriate; and develop a process for normalizing the digital images for the wide variety of digital systems in the industry. The 13 digital reference images illustrate eight grades of severity, and illustrate types and degrees of discontinuities found in aluminum-alloy castings with section thicknesses of 0.25 in. and 0.34 in. Read the original presentation, "Digital Radiography for Aluminum Castings." |
