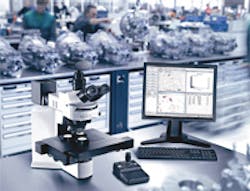
Microscopic Filter Analysis is Critical to Manufacturing Process
A new development from Olympus America is a system that inspects and analyzes residue on filters, a function that’s critical for documenting the purity and cleanliness of a manufacturing process. The Olympus Automated Filter Analysis System identifies, reports, and archives images and information on residual particles in a fast, accurate, and highly reliable manner. It was developed in accordance with U.S. and international standards to scan and analyze filters (which generally are 47 mm in diameter) in less than 2 minutes.
Optical images of residue are generated and can be counted/classified/documented in report templates. The fully automated system combines vision technology hardware and intuitive software developed to provide detailed data in compliance with many ISO and USP international standards, specifically ISO 4406, ISO 16232, and USP 788.
For a practical metalcasting application, Mario J. Gislao, manager, Light- Microscopy Imaging Products described an Olympus Filter Inspector solution in an aluminum foundry manufacturing precision-machined castings for the automotive or aerospace segments. “The quality control departments of such foundries would adhere to ISO4406 or ISO4407,” Gislao proposed, “which specify guidelines as to the cleanliness of these machines parts. Of course, cleanliness is of the utmost importance as any contaminates would directly effect the performance or longevity of the finished product.”
“Unlike manual optical inspection systems, the Olympus system accurately detects, counts, classifies, and measures residue particulates in filters,” says product manager for Industrial Microscopes at Olympus America Linda Sikel. “Because individual operators no longer have to examine each filter and make subjective judgments, there is a better integrity to the data.”
