Palmer Foundry is quite pleased with the high quality of its aluminum castings, and so are its many customers — and all this was true before it started collecting millions of new data points to verify the dimensional accuracy of its products. The Palmer, MA, operation produces highprecision, “dimensionally stable and vacuum tight” castings for applications like medical and scientific instruments and semi-conductor manufacturing. While these castings demand dimensional accuracy, not all of them are small – as might be assumed by so much emphasis on precision: some products weigh mere ounces, but others come in at up to 1,400 lb. That’s a problem for managing quality control operations.
Moreover, Palmer Foundry is shipping its castings across North America and to customers in China, Europe, and elsewhere, so there is a global reputation at stake in the veracity of its dimensional control.
If it seems like there are too many details for this problem to be addressed effectively, hold on: the answer involves even more details … millions of details.
Palmer Foundry has adopted an integrated quality control and inspection system that uses laser scanning to collect millions of reference points on casting dimensions and surface conditions, compiling an extensive documentation — for first article inspection (FAI), for quality control, for tooling or mold maintenance, and more.
“It’s a valuable tool in troubleshooting, because it gives us a baseline of data for a part,” Palmer Foundry president Bob Logan said.
“Typically, in the past, we’d inspect a part and it might lead to a multipage blueprint with 150 or 200 dimensions that we had inspected on a casting,” the foundry’s vice president, Dennis Hayden, elaborated. He noted that the integrated package of coordinate measurement arm and laser scanner, working with 3D inspection and metrology software, create a virtual model of the ideal part.
“Now, with this laser scanning capability, we’re measuring as many as 2 million data points, if we choose,” Hayden continued. “It gives us a truer representation of the space that the part is occupying. There is a tremendous amount of data that we are capturing that we could never capture before.”
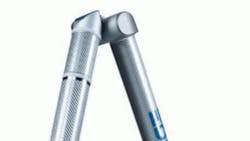
The CMM device is a Faro Technologies Faro Edge system, with on-board measuring capabilities that make it portable package, with “smart connectivity” and “smart sensor” technology, among numerous other capabilities that simplify the task of measuring objects and collecting data.
“The set-up task for each part is improved, too,” Logan offered. “Before, we’d have to position the part and balance it, and with this package we just set the part on the table and go. And, in the past if we had to do multiple setups to inspect a larger part we’d have to move it and repeat all the preliminary steps. The time savings adds up.”
Working with the CMM is an integrated, high-speed 3D scanner that uses laser technology to produce detailed, three-dimensional images of complex geometries, quickly and efficiently.
Speed is a significant aspect of the system’s effectiveness. “When we used more conventional technology to perform physical inspections, 200 dimensional measurements on a single casting might take two people two or three days to complete, depending on how many setups were needed,” Hayden pointed out. “So, with a laser scan we can collect 2 to 4 million points in maybe four hours. We get a lot more data in a shorter period of time.”
Software, of course, is part of the integrated system; for the Palmer Foundry installation, it is Geomagic’s Qualify digital metrology program It calculates the geometric dimensioning and tolerancing (GD&T) measurements for the data points that the arm and laser scanner collect, and compares those results to the solid (FAI) or CAD standard. This information is converted to a 3D graphic that highlights any variations from the standard, with data, detailed graphs, and narrative descriptions for any differences.
Palmer Foundry discovered the Faro laser-scanning package at technology expo, and adopted it late last year. The “plug and go” package included some basic training, which was effective Hayden said, though as the foundry’s technicians get more accustomed to using the system they are able to customize some of their standard (“drop down”) settings.
“We’ve really only scratched the surface of what this can do,” Hayden maintained. “We are in the midst of scanning or creating a baseline for parts that we’re making, and then down the road, after we’ve made ‘X’ number of parts, we’ll be able to a scan a subsequent part of that same design, and then we’ll have an indication of how a tool is wearing — if there’s been any shift in dimensions — based on tool usage.”
The CMM arm and laser scanner are fully portable, so the same simple set-up approach can be accomplished anywhere in the plant. Palmer Foundry operates two different production facilities — a green sand foundry and a no-bake foundry, all on a 10-acre site — so the system’s portability has real applicability. The arm and scanner can be arranged to work as a wireless data collection system, too.
Looking further, the scanner can be applied for mold inspection as well as FAI and product quality control. With the right software upgrades, it may even be deployed as a tool for reverse engineering existing parts, for casting design or prototyping programs.
“This is a technology that we bought at the right time,” Hayden concluded.
About the Author
Robert Brooks
Content Director
Robert Brooks has been a business-to-business reporter, writer, editor, and columnist for more than 20 years, specializing in the primary metal and basic manufacturing industries. His work has covered a wide range of topics, including process technology, resource development, material selection, product design, workforce development, and industrial market strategies, among others.
