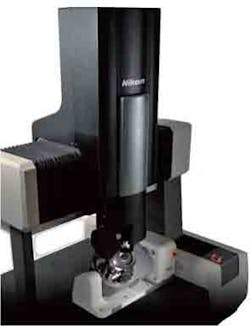
Multi-Sensor 3D Metrology System
Nikon Metrology reports that is HN-6060 non-contact inspection system provides the latest in metrology capabilities, including advanced laser scanning, 5-axis synchronized hardware control, “ultra stiff” design, and powerful processing software. It sets the standard for fast, ultra-precise inspection of complex shapes, according to the developer, including gear teeth, turbine blades, appliance housings, and more.
Nikon Metrology’s portfolio includes state-of-the-art vision measuring instruments with optical inspection and mechanical 3D metrology systems.
“The HN-6060 multi-sensor system builds upon the Nikon Metrology portfolio of vision systems and 3D solutions,” stated Myles Richard, managing director of Americas. “It addresses the need for fast, high-accuracy 3D inspection of complex shapes by combining innovative optical technology with the highest precision measurement hardware.”
The system’s newly designed laser scanning sensor extracts the surface form and waviness data in one scan. Previously tactile gear-inspection tools needed to rely on 2D sections of data. This advancement provides better inspection possibilities, revealing all shape and waviness information in one simple measurement.
“What the HN-6060 provides is a much easier, quicker and more precise method of 3D data capture than metrology systems have demonstrated before,” explained Robert Wasilesky, senior vice president of Sales for Nikon Metrology. “The demand for high-accuracy, 3D surface metrology systems continues to increase as the automotive, aerospace, and appliances industries also implement higher precision.”
The system’s laser scanner and SFF (shape from focus) sensor use active texture projection to perform high-precision measurement of shapes even with glossy surfaces or no surface texture. Touch probes and optical heads with built-in TTL laser AF complete the multi-sensor system. This allows it to perform shape measurements of parts such as complex automotive and machined components, molded parts, and medical devices.
Another important design detail of the HN-6060 is its five-axes synchronized hardware control. This allows optimal part orientation to the sensor and can measure the part from different angles. The system is not only designed to measure complex surfaces such as hypoid gears, worm gears and helical gears; it also inspects turbine blades, digital camera housings, complex closures and more.
The HN-6060 software integrates with the measurement hardware and is designed for user operability and safety. It features macro-based teach-in, simulation for collision avoidance, easy acquisition of point clouds from 2D and 3D shapes, and insightful part-to-CAD comparison.
Visit www.nikonmetrology.com
