Full-Field, 3D Digitization of Castings, Shapes, and Models
Doncasters Precision Castings been in business for nearly 250 years, and that long record has earned it a solid reputation for product quality. It operates investment casting foundries in the U.S., U.K., Germany, China, India, and Mexico, producing parts for OEMs that supply aerospace engines, industrial gas turbines, and specialty vehicles.
Turbine blades produced by vacuum casting processes are a particular specialty, and at the Doncasters foundry in Bochum, Germany, turbine blades are produced in several superalloy materials for IGT systems. And thanks to steadily advancing customer requirements, the shape and dimensions of turbine blades are increasingly complex.
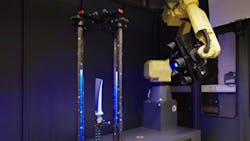
The complexity does not affect the expectation for the blades’ dimensional accuracy, and so in order to gather accurate measurements Doncasters adopted Zeiss Industrial Quality Solutions’ ATOS 5 scanning technology.
“For the production of our high-end products, we also need high-end inspection methods,” offered Dr. Jens Vrenegor, who heads 3D metrology and technology Development for Doncasters in Bochum. “With the ATOS 3D scanners, we can not only accelerate the measuring times by a factor of two to three but also completely scan critical products.”
The full-field, 3D digitization of cast parts, ceramic shapes, and wax models ensures reliable data capture of the blades internal and external geometries. That means that the foundry can carry out accurate analyses, minimizing the risk of failure of industrial gas turbines in operation.
Zeiss ATOS 5 is a high-performance optical 3D scanner that uses structured blue light and a "Triple Scan" principle to capture 3D data quickly and accurately. It's designed for use in production and quality control. Scanning of large and complex parts is fast, even with difficult surfaces; the performance is described as “robust”; and the results are traceable measurement data suitable for aerospace systems, tooling, and various other demanding industrial applications.
The scanning process starts with the ATOS 5 unit projecting a patterned blue light onto a part's surface. Blue light is filtered from ambient light, which prevents interference.
Using the Zeiss Triple Scan principle, two high-resolution stereo cameras capture the projected fringe patterns from different angles. The captured images are analyzed according to custom Zeiss Inspect software and - referencing up to 12 million measuring points per scan - high-resolution images of the object are generated to present a 3D digital twin of the object. Captured data can be analyzed using a nominal-actual comparison, according to the developer, and deviations can be identified quickly, removing scrap from the process early in the production sequence.
“Unlike point-based systems, the ATOS 5 captures the entire surface of an object in a single scan,” according to the developer.


